Portfolio: Theme
My theme is sports
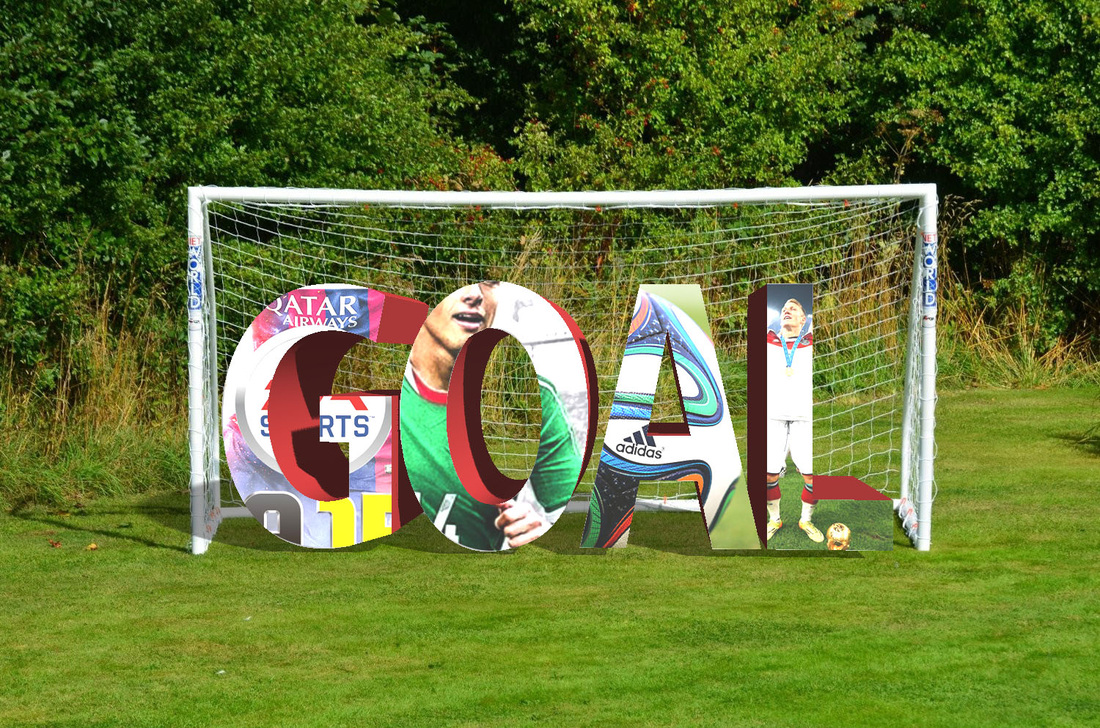
- Open a picture of a soccer goal for the background.
- Created a text box and type the letter G
- Then used the shortcut control+J in order to create multiple letters all of the same sizes.
- I then change the letter on each layer under the original G to O, then A, ETC...
- I then selected the four soccer related images
- Put them behind each piece of text and created a clipping mask
- manipulated the shadow to match that of the goal
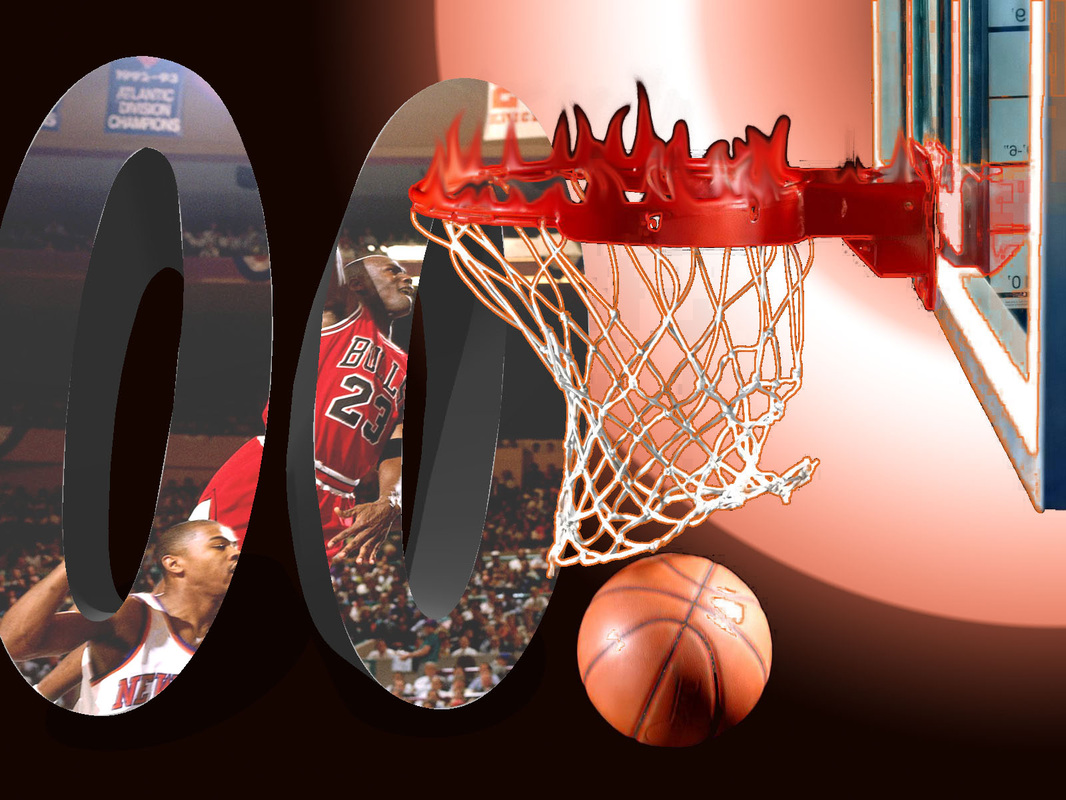
- use the color the selection tool on the White basketball hoop.
- The stroke them with the color orange,
- Select the color read and copy the rim onto a different layer.
- Use the blur tool to create a fire effect and stroke it with black.
- Create type layer and type 00.
- Embed image of Micheal Jorodm
- Create cliping mask of MJ with the 00 under it.
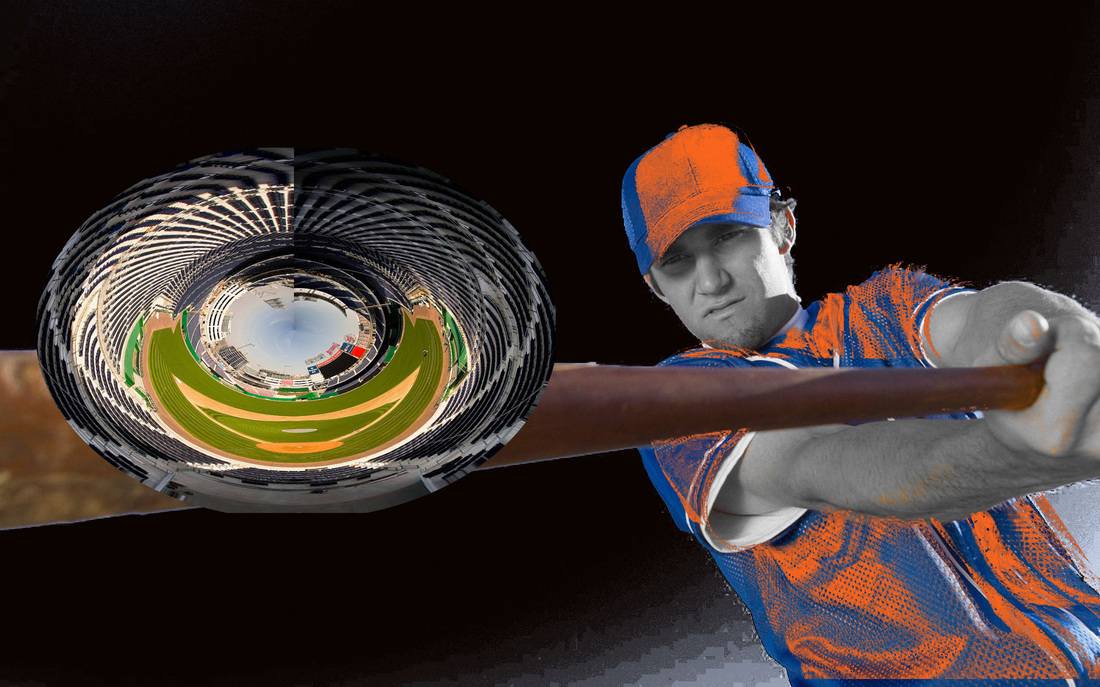
- I selected a shade of blew from the original uniform and filled it with orange the off set it.
- I then used the color selection tool to select the batters skin tone and i desaturated the skin
- i then opened a picture of a baseball stadium
- I inverted the image and i appleid the polar coordinates filter
- I quick selcted the cirle and duplicated it iont the original baseball player and moved it to cover the baseball.

- color selected ice and filled it with a low opacity color overlay.
- selected other parts of the shoelace and the hockey stick.
- I then filled those with their respective colors
- I moved them to give a 3D effect.
- I Found a copy of the United States Hockey logo and imbeded it
- I deleted the background around it and the under it created a gradient,
- I then embeded the out line of a helment and erased part of the back strap giving it the allusion that if fit the logo.
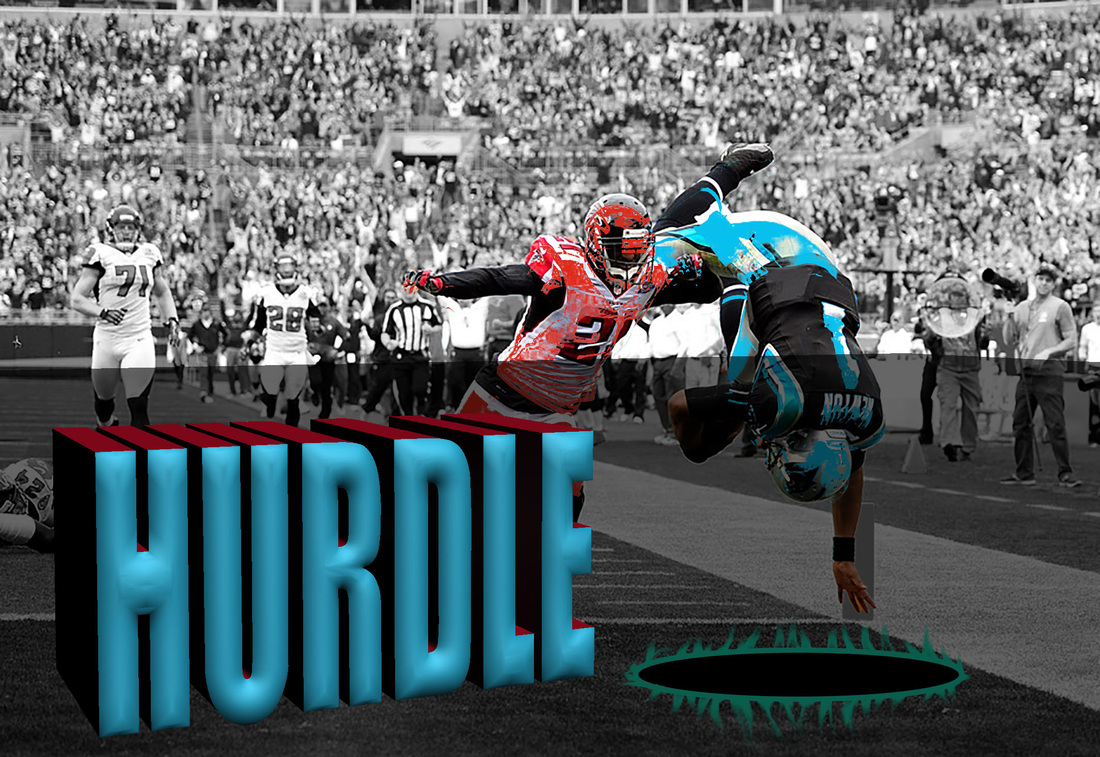
- Select the players using the quick selection tool
- copy them to a separate layer using control + J
- Desaturate the background of the original image.
- use the color selection tool on the layer mentioned on step two.
- fill the selections with the color of choice.
- use the movement tool to off set the color selcection
- Create ellispe tool fill it with black and give it a stroke.
- Use the smuge tool on that stroke to create the flames
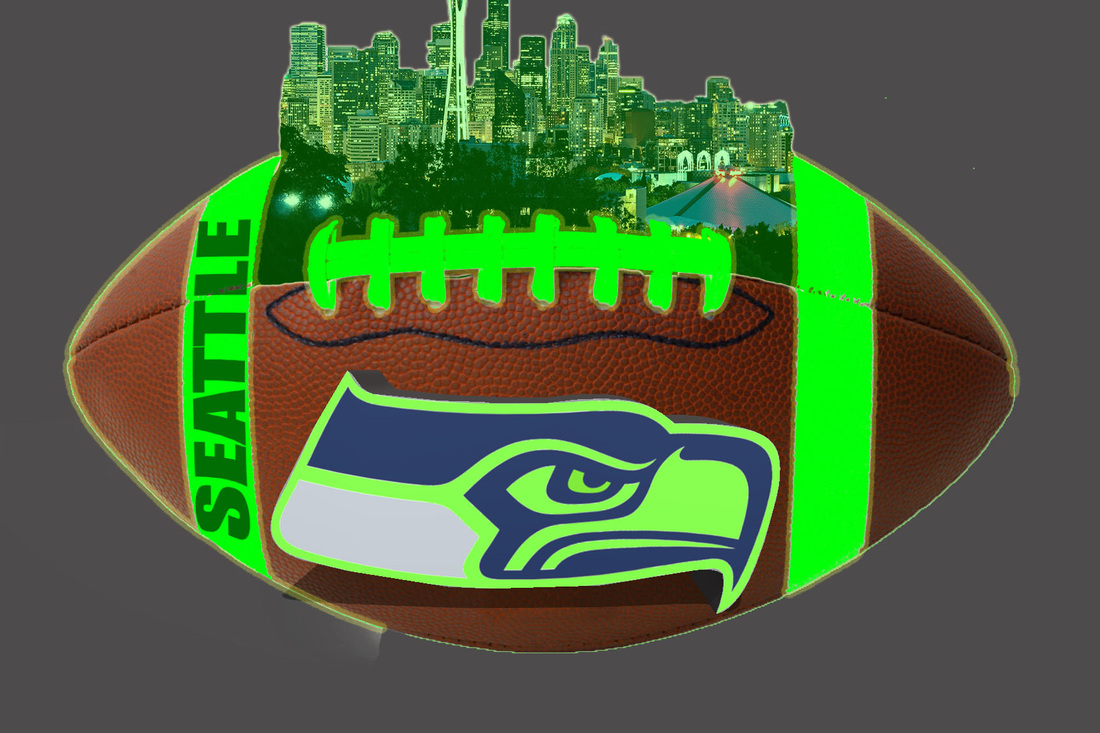
- Open image of foot ball
- use the color selection tool to select the white
- give the white a green overlay and outer glow
- Apply text box on top of the grow
- Embedded an image of the Seattle skyline under the glowing stripes and stitching.
- Erased the portions of the image that exceeded those boundaries.
- apply cover overlay to the city with a low opacity.
- acquired sea hawks logo and removed background
- created an extrusion of the sea hawks logo
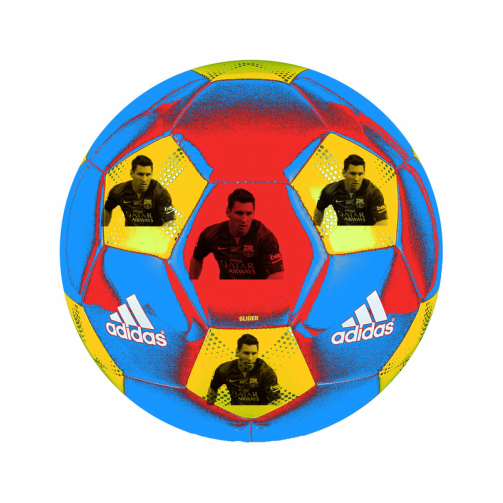
- chose picture of soccor balll
- used color selection tool in on the black, the green
- the filled each with blue and red respectivly
- then created a brush preset of messi in his bacelona kit
- placed the brush
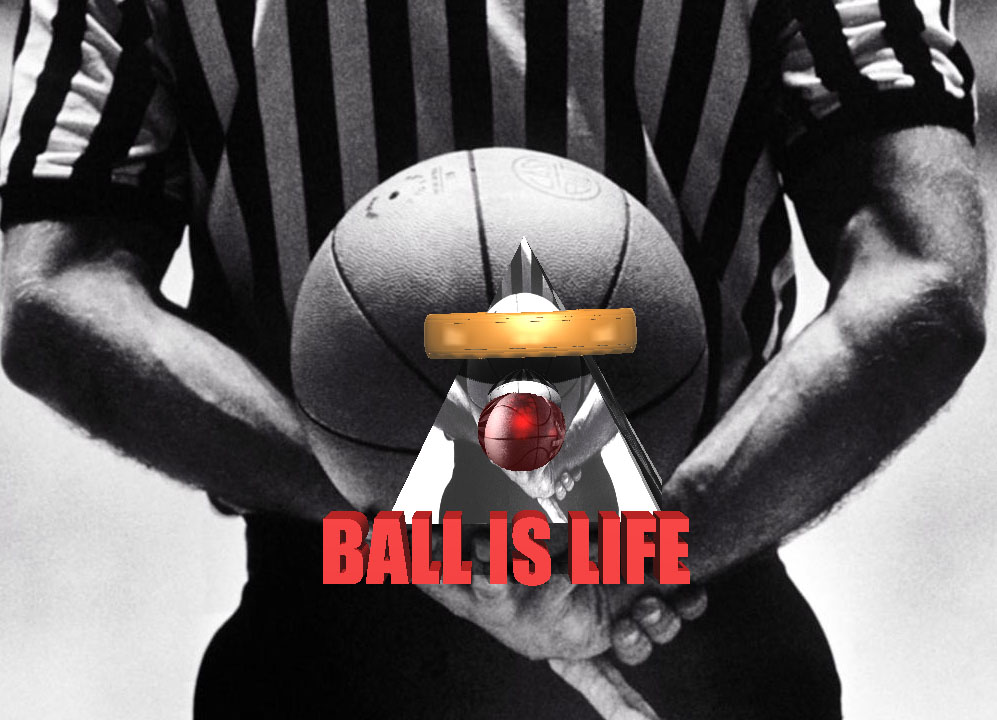
- created a pyramid and used the referee in place of a standard mesh.
- copied that mesh on to the other sides
- added a sphere to the scenes and adjusted its diffuse color to a read.
- I then added a ring and changed the diffuse to gold
- And finally added text with a simple diffuse modification
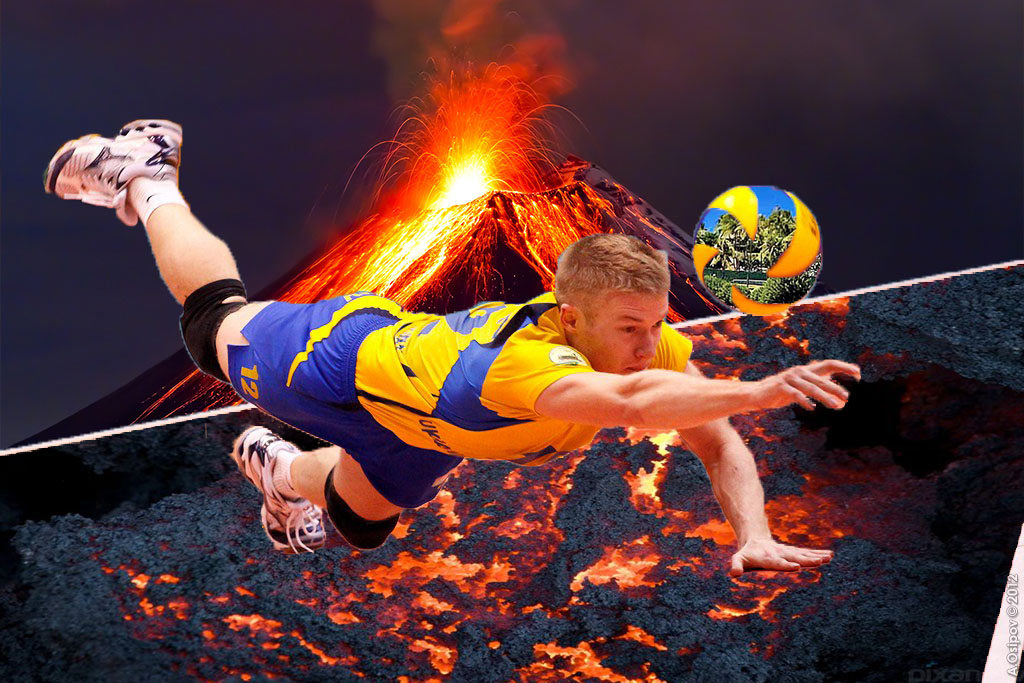
- embed layers of lava into the original picutre
- the selected the floor and created two clipping mask of the sections.
- I the used the color selection tool and then the deselect tool to select only part of the ball and create a cliping mask of the palm trees
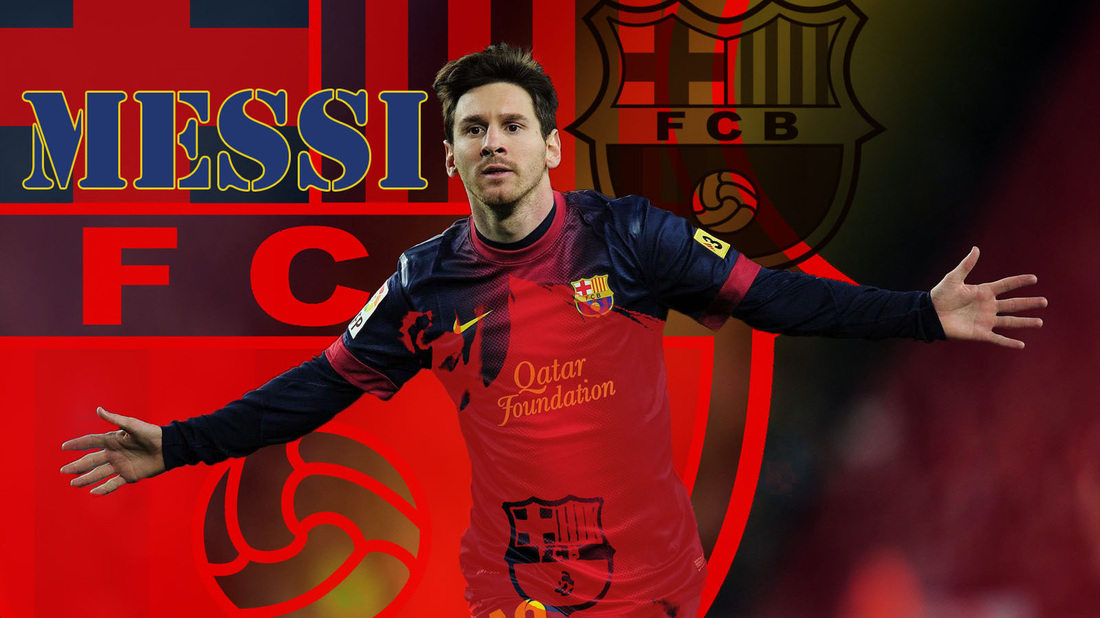
- Picture of Messi
- duplicate the background layer
- Erase the background 'of the original picture
- create a brush of a second Messi picture and apply that to the original messin in the color red with a 70% opacity.
- creae two mor copies of the F.C Barcelona logo and stamp them on the image.
- Type text in and add a yellow stroke.
9 WEEKS Project
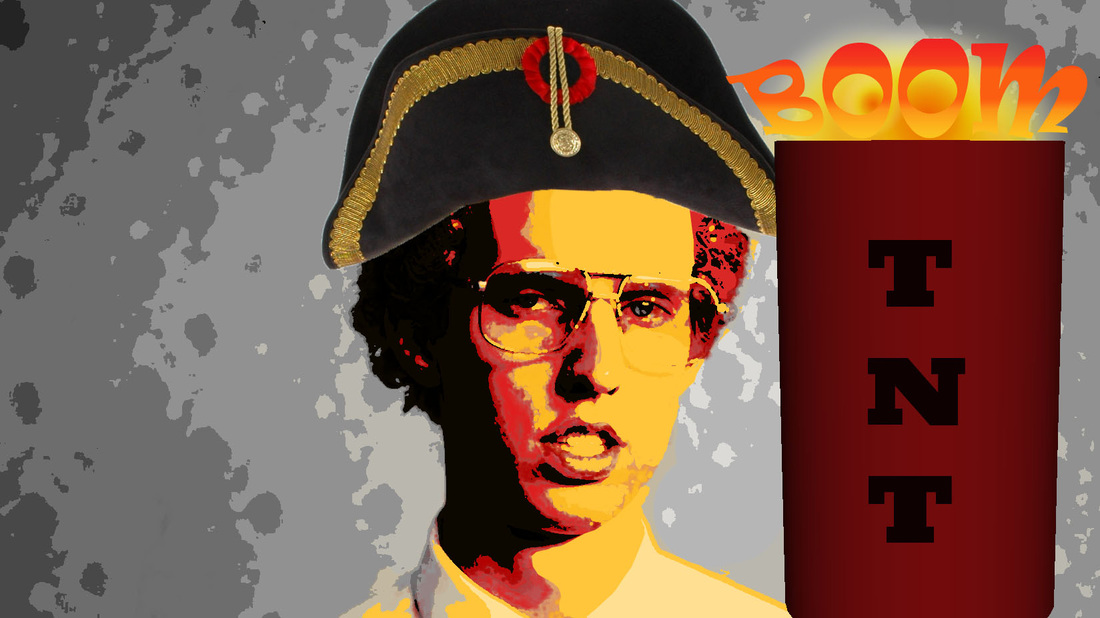
- Used the collection tool to selecte the hair and move it to another layer.
- Fill that layer with black.
- The select the shadows caused by their face black.
- Select different skintones and fill the darker tones with red and the lighter tones with red.
- create a cylinder and color it red
- Add type layer and orient it vertically and type TNT
- Then in another type layer type BOOM
- warp that Layer into an ark
- Fill it with a gradient useing a clipping mask
- create a orange and yellow gradient. and draw a circle behind a text.
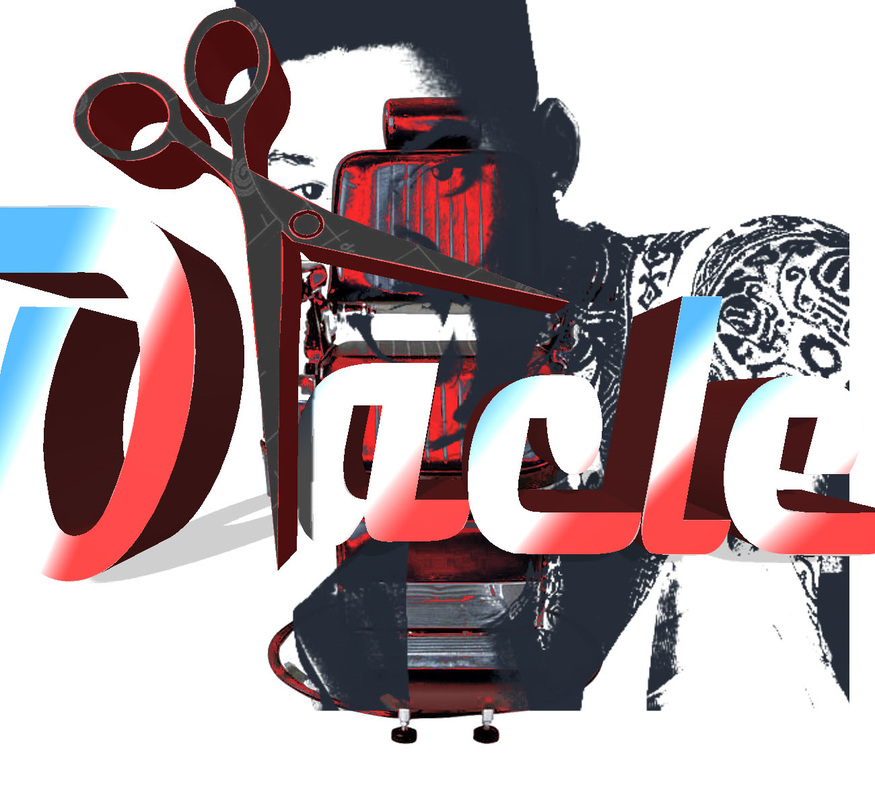
- Type the letter O
- Create 4 copies of the text layer
- Change them to the letters a, c,l,e
- Then create a gradient that is blue white and red and add them on separate layers between each letter.
- Transform it into 3D and change the extrusion to red.
- Create a separate layer and a brush of a person
- embed a picture of a chair and use the quick selection tool and color selection tool to select and remove the background.
- Turn the scissors black and convert them to 3D
- Change the extrusion to the color red.
- Fuse the two 3D layers together
- Move the Light Source.
